Image-switcher snippet
Since my plan today was to start working on creating the portfolio/past work section of this site, I decided to start by creating a few simple snippets that I thought would likely come in handy.
The first of these being a simple image switcher. The idea behind the snippet was pretty much to just be able to put some images inside a div with a particular class and have the snippet do all the work. A little bit of dojo later and the below is the result.


(images “borrowed” from the interweb)
To use the snippet all you need to add Dojo to the page, then import the jsnippet CSS and JavaScript files. After that just add a div to the page with the class “jsnipImageSwitcher”. The above Image switcher for instance is actually just the following HTML wirtten in to the page.
<div class="jsnipImageSwitcher" style="width: 400px;">
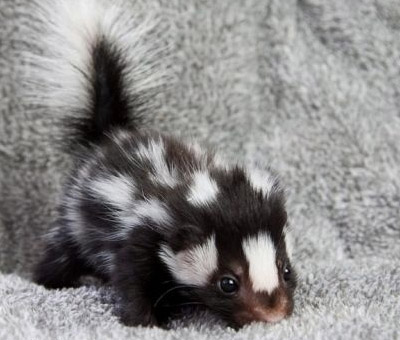
<img src="/demo/img/skunk.jpg" alt="A baby skunk!" />
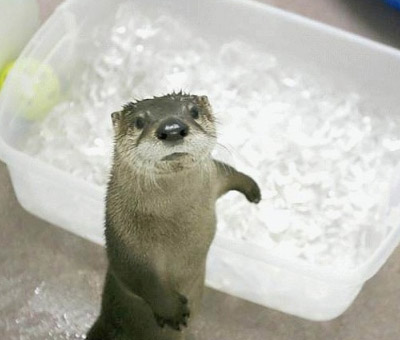
<img src="/demo/img/otter.jpg" alt="An otter" />
<img src="/demo/img/bunny.jpg" alt="A Bunny Rabbit" />
<img src="/demo/img/seal.jpg" alt="Upside down Seal" />
<img src="/demo/img/kittendog.jpg" alt="A Kitten sleeping next to a big dog" />
</div>
The snippet will work out the amount of images dynamically so there are no limits to how many can be used within it. The only limitation to the above being that the default styles may not leave room to fit the dots. As you may have noticed the snippet also pulls it’s caption from the images alt attribute, which has the added bonus of improving the images ability to be found by search.
If for any reason JavaScript is not enabled in a user’s browser the images will display normally without any side-effects as a result of being part of the snippet. The snippet is tested in Firefox, Chrome and IE9.
If your interested in knowing how the snippet works, keep reading after the jump for a full explanation.
The full (commented) JavaScript code for the snippet is as follows, although I will go over it in more detail below (I will be assuming a basic knowledge of JavaScript, so feel free to ask in the comments if you want me to explain something better).
dojo.query(".jsnipImageSwitcher").forEach(function(node, index){
	//Create images array + current index;
	var images = node.getElementsByTagName('img');//Get images contained
	var current = 0;

	//Create control bar DOM objects
	var n = dojo.create("div", {class:'bar'}, node);
	var tagLine = dojo.create("div", {class:'tagLine'}, null);

	//Function to be called when next image change is needed.
	var scrollChange = function(evt) {
		//Get array of all the buttons, then make them show as inactive
		buttonAr = this.parentNode.getElementsByTagName('a');
		for(var a=0;a<buttonAr.length;a++){
			dojo.removeClass(buttonAr[a],'active');
		}
		//Make the clicked button the new active one.
		dojo.addClass(this,'active');

		//Update the current image index (store old, so we can still use it temporairly)
		old = current;
		current = this.getAttribute('idx');
		//Update tagline with the new title
		tagLine.innerHTML = images[current].getAttribute('alt');
		//Fade old image out, fade new image in.
		dojo.fadeOut({
			node: images[old],
			onEnd: function(){
				//Once old image is faded out, display it as none then setup the new
				// image to fade in.
				images[old].style.display = 'none';
				images[current].style.display = 'inline';
				images[current].style.opacity = '0';
				//Fade new image in
				dojo.fadeIn({node: images[current]}).play();
			}
		}).play();
	}

	//Loop threw images to actually set the snippet up.
	for(var i=0;i<images.length;i++){
		//If its not the very first image, make it invisable.
		if(i!==0) images[i].style.display = 'none';
		//Create the link element (button used to change image)
		l = dojo.create("a", {innerHTML:'.', href:'#', idx:i}, n);
		//Make the first image's button active and set the tagline with its alt attribute.
		if(i==0){
			dojo.addClass(l,'active');
			tagLine.innerHTML = images[i].getAttribute('alt');
		}
		//If a scroll button gets clicked.
		dojo.connect(l,'onclick', scrollChange);
	}
	//add the tagline to the page
	dojo.place(tagLine,n);
  });
The first bit of the code basically just searches through the code on the page looking for anything with the class “.jsnipImageSwitcher”. Each time it finds this class it calls the contained function to create a new instance of the snippet.
dojo.query(".jsnipImageSwitcher").forEach(function(node, index, arr){
Those more familiar with JQuery may note that it’s pretty much the equivalent of
$(".jsnipImageSwitcher").each(function(index, node){
The next line will create an array based on all the img elements it can find within the current jsnipImageSwitcher node.
var images = node.getElementsByTagName('img');//Get images contained
The dojo create method is then used a few times to create some of the snippets additional elements. As a basic overview the method creates a DOM node of the type provided in the first parameter, in the below examples case a div. Then applies any attributes (which are specified in JSON) from the second parameter and finally appends the element to the node provided as the 3rd parameter. If that made no sense Dojo’s reference guide explains it much more clearly.
dojo.create("div", {class:'bar'}, node);
//Creates <div class='bar'></div> and places it within the element specified by the node variable.
The next piece of code is pretty much the heart of the snippet and is the function that get called each time the controls at the bottom of the snippet are clicked.
The function itself is stored in the variable scrollChange.
var scrollChange = function(evt) {
When called the first thing the function does is remove the “active” class from the previously selected images control (Basically it makes all the dots grey again). In the below code “this” refers to the element that was clicked which in this case was an A element. The A elements parent (which is the control div) is then accessed and another usage of getElementsByTagName() is used in order to get an array of all A tags contained within it. The code then loops through the returned A tags using dojo’s removeClass function to get rid of the class “active” whenever it is found.
buttonAr = this.parentNode.getElementsByTagName('a');
for(var a=0;a<buttonAr.length;a++){
	dojo.removeClass(buttonAr[a],'active');
}
Once this is done dojo’s addClass method is called from “this” (the A tag that was clicked) to give it the active class and thus correct styling.
dojo.addClass(this,'active');
The next step is to store the current image index (contained in the variable current) into a variable called old then update the current variable itself to contain the index of the newly selected image. The index of each image is stored in an attribute of each link called idx.
The line of this code then updates the contents of the tagline element with the contents of the new current images alt attribute.
//Update the current image index (store old, so we can still use it temporairly)
old = current;
current = this.getAttribute('idx');
//Update tagline with the new title
tagLine.innerHTML = images[current].getAttribute('alt');
The final part of the scrollChange function, although rather complicated looking doesn’t really do much other than use dojo’s fadeIn and fadeOut effects to make swapping the images a little prettier.
		//Fade old image out, fade new image in.
		dojo.fadeOut({
			node: images[old],
			onEnd: function(){
				//Once old image is faded out, display it as none then setup the new image to fade in.
				images[old].style.display = 'none';
				images[current].style.display = 'inline';
				images[current].style.opacity = '0';
				//Fade new image in
				dojo.fadeIn({node: images[current]}).play();
			}
		}).play();
If you don’t really need the animation this whole part could just be replaced by the following line if you felt the need.
images[old].style.display = 'none';images[current].style.display = 'inline';
The very last thing the code needs to do to makes the snippet work is to actually format everything so the scrollChange function both be called and actually has something it can act on.
It works by looping though the array of image nodes that were worked out at the beginning of the snippet. For each one it then performs the following actions;
- If it’s not the first image; hide it from view.
- Create a dot in the control for this image (add the idx attribute to it while we are at it).
- If it’s the first image, mark it’s dot as active and display its alt attributes content in the tagline/caption.
- Attach the scrollChange function to the dot so that the function is called whenever it’s clicked.
Once all the images have been added the last line simply appends the tagline node to the control bar.
//Loop threw images to actually set the snippet up.
	for(var i=0;i<images.length;i++){
		//If its not the very first image, make it invisable.
		if(i!==0) images[i].style.display = 'none';
		//Create the link element (button used to change image)
		l = dojo.create("a", {innerHTML:'.', href:'#', idx:i}, n);
		//Make the first image's button active and set the tagline with its alt attribute.
		if(i==0){
			dojo.addClass(l,'active');
			tagLine.innerHTML = images[i].getAttribute('alt');
		}
		//If a scroll button gets clicked.
		dojo.connect(l,'onclick', scrollChange);
	}
	//add the tagline to the page
	dojo.place(tagLine,n);
And that is pretty much it. Feel free to ask any questions as I expect my explanation may leave a little to be desired. Plus feel free to use/change/whatever the snippet yourself. A link back would be nice, but isn’t required 🙂